

Geometric Art
GEOMETRIC · PHOTO + MOTION ART

Give your photos
a geometric twist.

Turn a familiar image into lines, textures, and unexpected color. Start with a quick roll in Geometric Art, then try a more deliberate look in Pro.

Open Geometric Art (opens in a new tab)

What you’ll make
A square photo treatment you can save as a PNG, plus a reusable preset. We’ll also show where to export a short video.

What you’ll need
A browser and a photo—or just use the demo image. These screenshots use the built-in portrait credited to Valeria Lendel / Unsplash.

Start with a photo.

Open Easy mode in English. Keep the demo image for your first experiment, or choose Use my photo to pick an image or video. New photo swaps in another Unsplash image.

Choose Square 1:1 in the format menu along the bottom. A portrait with a clear silhouette is a useful first test: it makes changes to lines and texture easy to spot. Close the introductory tip if it covers your image.
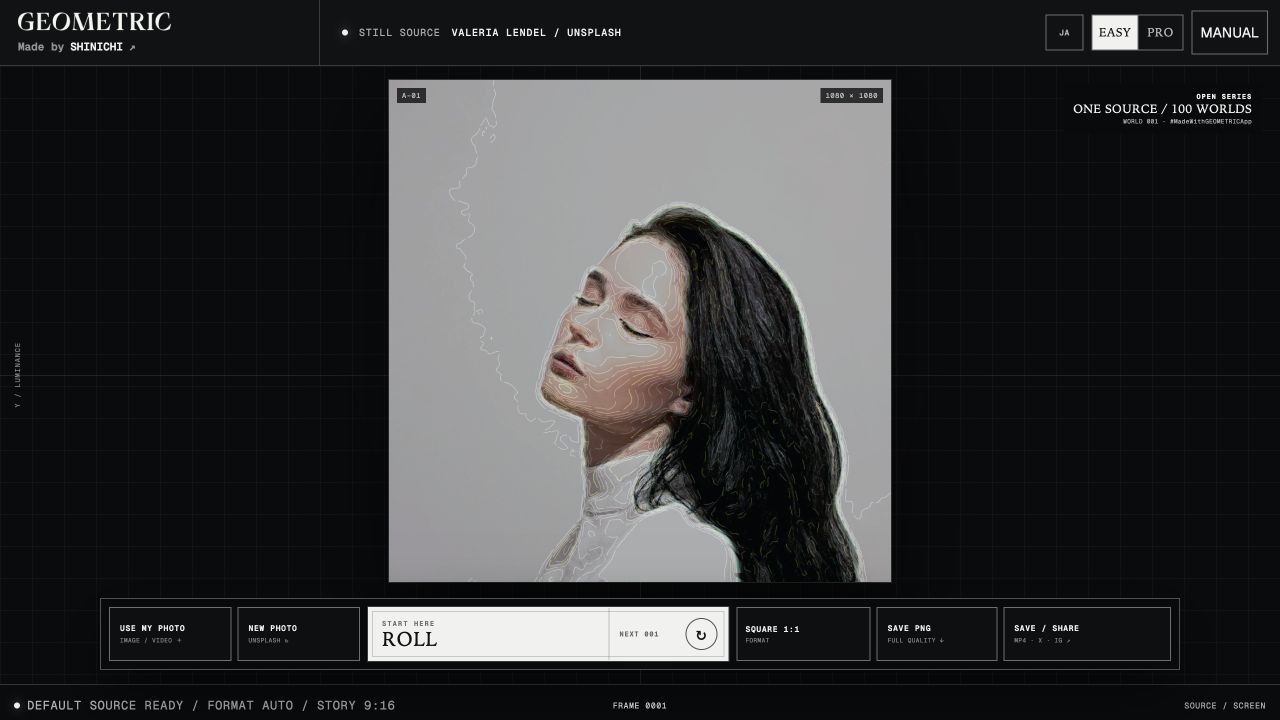
Geometric Art Easy mode showing the demo portrait, photo buttons, Roll, and Square 1:1 format
The Easy workspace: your image in the center and the essential controls along the bottom.View full size

Roll until something clicks.

Press Roll, then Roll again to explore more treatments. The source and chosen ratio stay in place while the look changes. Our second roll produced this blue, textured portrait; yours will be different.

Try a few versions and notice what you like: the color, the amount of detail, or how much of the original photo is still visible. Choose Save PNG when you find a keeper, before rolling again or changing modes.
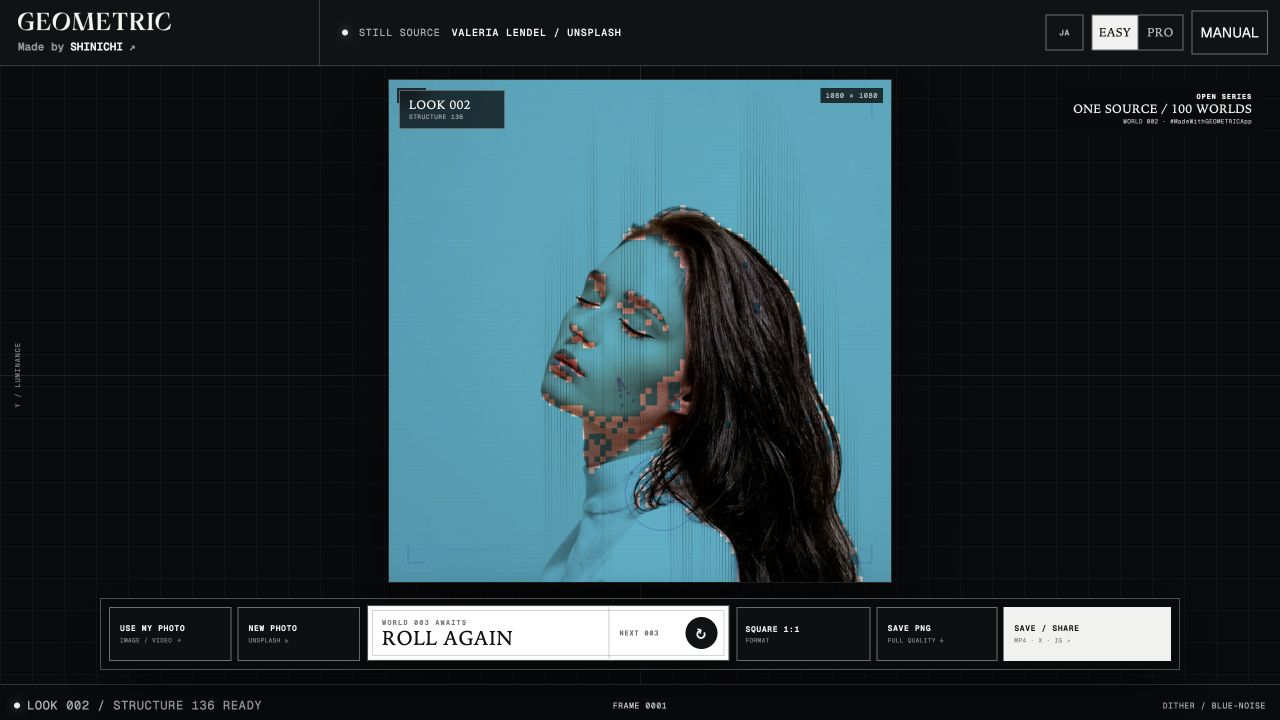
A blue textured portrait generated with Roll again in Easy mode
A generated look from the same photo. Roll is for discovery; it won’t reproduce this exact result on every visit.View full size

Make a deliberate version in Pro.

Open Pro mode for a fresh composition. In our walkthrough, switching from Easy reopened the default source and ratio, so save your Easy result first. Load your photo again if needed and choose Flow Engraving from Look preset above the preview.

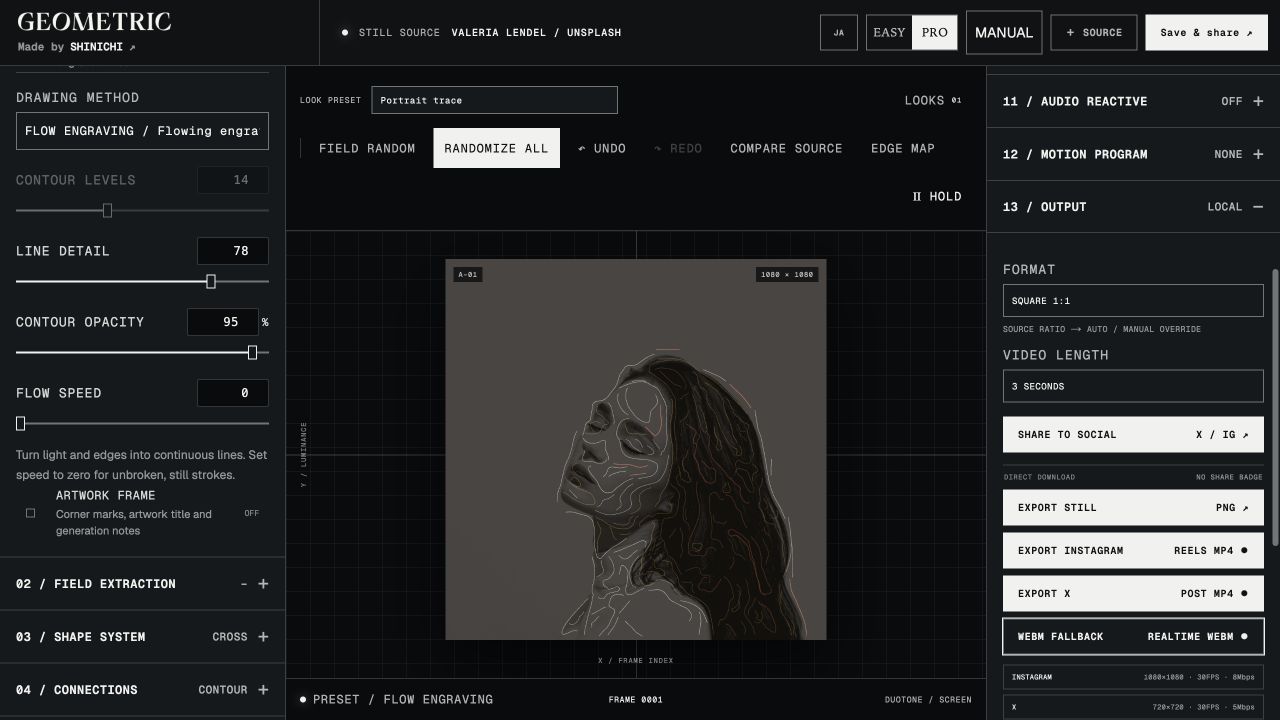
Open Contour Studio on the left and make sure Source contours is on. Try this starting point, then adjust one setting at a time:

Line detail 78
Start with fine tracing, then lower it to simplify the treatment.
Contour opacity 95%
Keep the lines prominent; lower it for a subtler overlay.
Flow speed 0
Inspect continuous, still strokes. Raise it when you want the lines to move.

The preset selector may change to Custom / Manual after an edit. Use Compare source to check the photo and Undo to step back. Contour levels is unavailable in Flow Engraving; switch the drawing method to Topographic to use it.
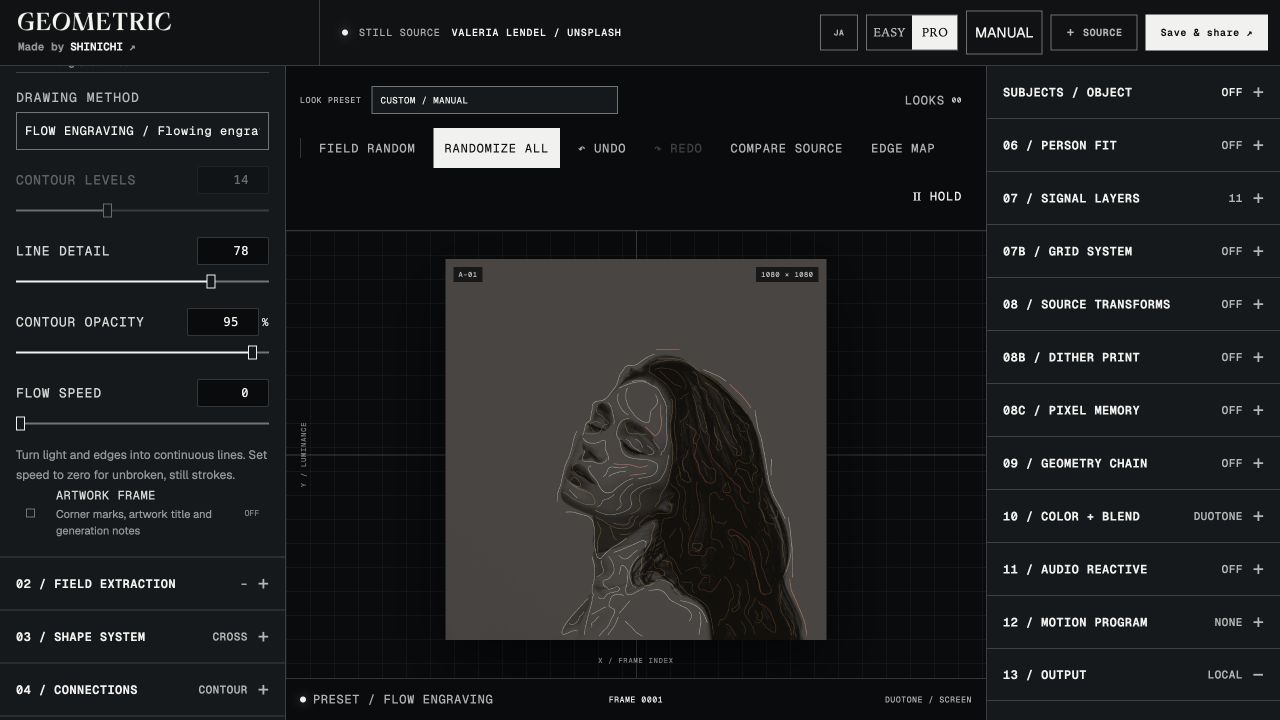
Pro mode with Flow Engraving, Line detail 78, Contour opacity 95 percent, and Flow speed 0
Our line treatment, with the controls visible on the left. The screenshot uses Square 1:1, selected in Output.View full size

Keep the settings you like.

Open Looks above the preview. Enter a preset name—we used “Portrait trace”—and choose Save preset. Your saved look appears in the library, ready to load again.

Use Copy settings and paste the JSON into a text file for a backup. A preset saves the visual settings, not the photo, audio, or output format. Keep the original media and note your ratio separately. Browser presets can disappear if you clear the site’s data.
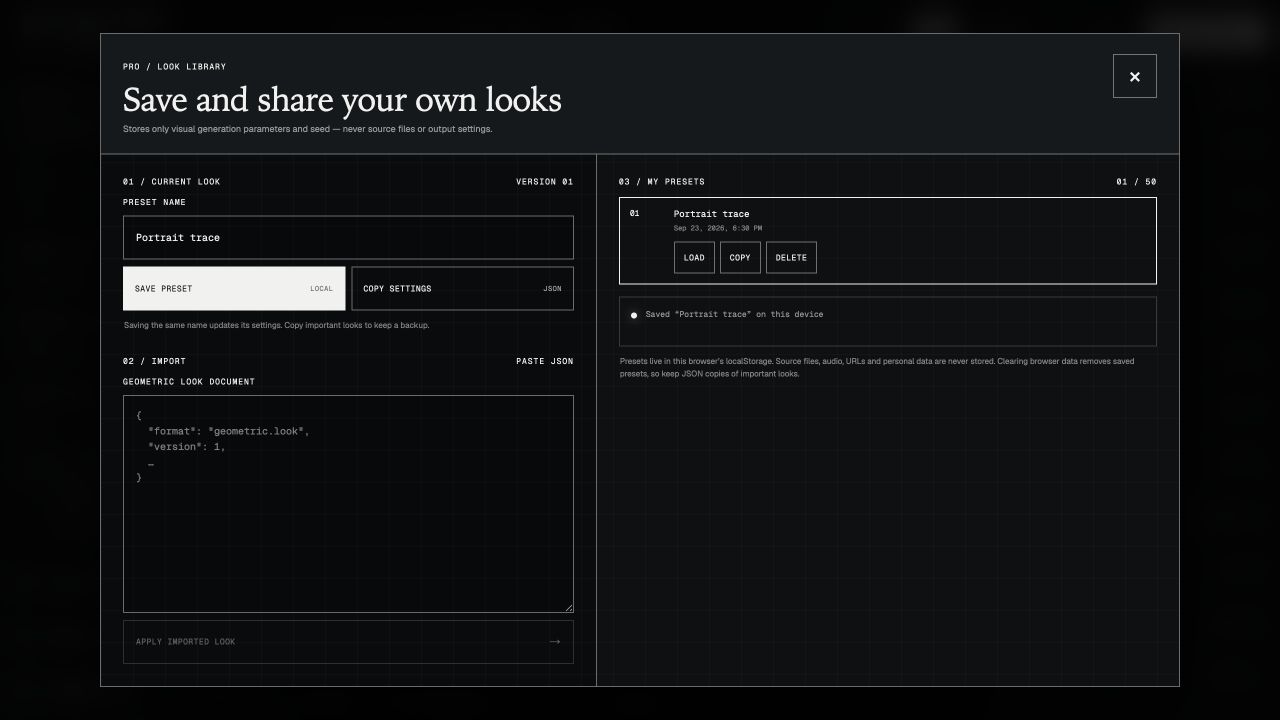
The Looks library with a locally saved preset named Portrait trace
A saved preset and the Copy settings control. Saving the artwork itself is the next step.View full size

Take it out of the browser.

Scroll the right panel to 13 / Output. Choose the format before exporting: square for a tile, portrait for a taller post, story for a vertical screen, or wide for a landscape composition. Recheck the framing after changing it.

A still image

Choose Export still to download a PNG. Our square example started a 1080 × 1080 PNG download.

A short video

For this line treatment, raise Flow speed first. Set Video length to 3 seconds for a test, then use Export Instagram or Export X for an MP4. Check the dimensions shown under the buttons.

Keep the tab open while it exports. If MP4 isn’t supported, try WebM fallback and keep the tab visible during recording. Downloading a file does not post it to social media.
The Output panel with Square 1:1, a three-second video length, PNG, MP4, and WebM export buttons
Direct-download controls in Pro. Choose PNG for an image or one of the video options for motion.View full size

Common questions

Why is a control greyed out?

Check the effect’s on/off switch and drawing method. For example, Contour levels works with Topographic, not Flow Engraving. Opening a panel alone does not enable its effect.

Why does my preview stop moving?

Check Hold / Live and Flow speed. Hold pauses the preview; it is different from Freeze still frame, which can keep an image-based composition fixed during video export too.

Can I use a video instead of a photo?

Yes. The source picker accepts video as well as images. The interface lists MP4, MOV, and WebM, with a 100 MB, 4K, five-minute limit. Browser codec support still matters.

Where are my photos and presets saved?

Geometric Art says source media is processed on your device. Loaded media does not survive a reload. Presets are saved in that browser, so keep your source files and a separate settings backup.

Sources & credits

Geometric Art is made by SHINICHI. This independent toolandtea walkthrough uses screenshots captured from the app on September 23, 2026. Demo photograph: Valeria Lendel / Unsplash, as credited in the app.

Explore Easy mode, Pro mode, and the official Pro manual for the complete controls and current export requirements.